Key Highlights
- Gel pens are a versatile tool for adding shimmering highlights to your artwork.
- Understanding the different types of gel pens and their properties is crucial for achieving the desired effects.
- Proper preparation of your art surface and layering techniques can enhance the vibrancy and dimension of highlights.
- Experiment with blending gel pen highlights with other mediums like coloured pencils or watercolours.
- Learn to seal and protect your artwork to ensure the longevity of the shimmering highlights.
Introduction
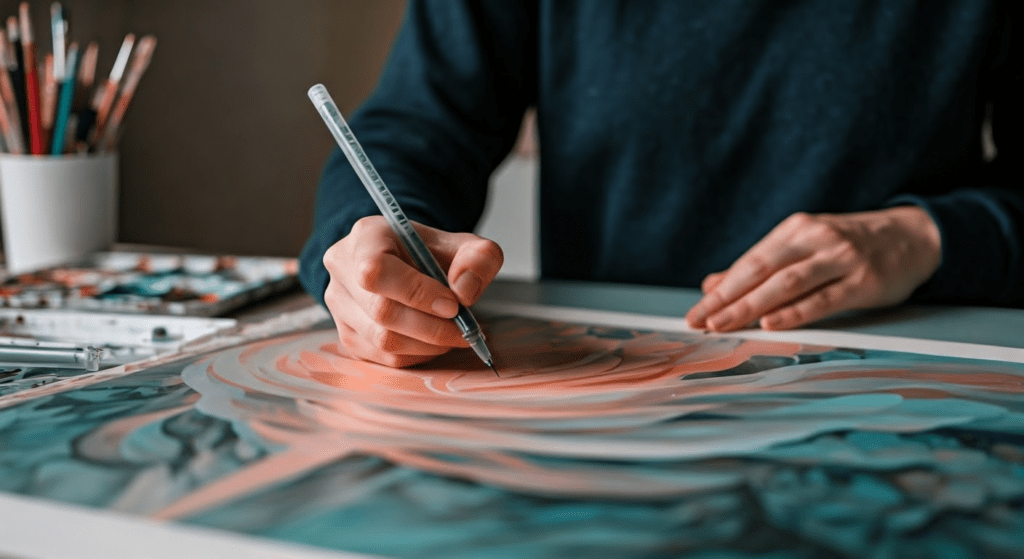
Gel pens are popular because of their bright colors and easy use. They are not just tools for writing anymore. The gel ink inside them has strong pigment, making them great for artists. This ink helps add shiny highlights to their artwork. These highlights can really bring a piece to life and create depth. Also, gel ink lasts a long time. This means your art will keep its beauty for many years.
Techniques for Creating Shimmering Highlights with Gel Pens
One easy and effective way to create shining highlights is by using light circular motions. This technique is known as “scumbling.” It helps the shiny particles in gel ink reflect light, making a sparkling effect. You can also change the pressure while drawing to make the shimmer range from soft to very bright.
Besides scumbling, you can try different strokes like hatching or cross-hatching. These can give you special textures and looks. For example, short and directional strokes can highlight the shape of an object, making it seem 3D. Don’t be afraid to explore. Let your creativity lead you to find unique ways to make your artwork shine.
Choosing the Right Gel Pen for Your Artwork
Choosing the right gel pen is very important for getting beautiful highlights in your artwork. Unlike regular ballpoint pens, gel pens come in a wide range of colors and finishes. This is because gel ink is made up of tiny pigments mixed in a water-based gel, which gives you many options.
For the best shimmer, pick gel pens made with metallic or pearlescent inks. These inks often have mica or special reflective bits that catch the light, adding a nice sparkle to your art. White gel pens can also be great, even if they don’t have shimmer. They work well for layering and making bright highlights on dark paper or with other tools.
When choosing your colors, think about how different shades will blend or contrast with the colors you already have. Feel free to experiment with bold colors or soft combinations. The beauty of art is that it’s personal, so trust your feelings and enjoy trying out different colors and mixes.
Preparing Your Art Surface for Gel Pen Highlights
Preparing your art surface well is very important. This helps you get bright colors and stops gel ink from bleeding or feathering. The most important thing is to use a smooth surface that works well with water-based materials.
If you are using paper, try to get high-quality drawing paper or cardstock made for mixed media. These types of paper are thicker and smoother. They stop the ink from soaking into the paper, which gives you sharper lines and brighter colors.
If you like the light texture of pastel paper, it is a good idea to spray a light fixative on it first. This creates a barrier, stops the ink from spreading, and keeps the nice texture of the paper.
Layering Colors for Depth and Dimension
Layering different colors of gel pens is a great way to add depth and dimension to your highlights. By carefully putting lighter shades over darker ones, you can make beautiful gradients and glowing effects. Many gel inks are see-through, which helps the colors mix and create a rich look that is hard to get with other materials.
Start by using your lightest color first. Then, slowly add more intense colors with each layer. For example, you might begin with a light yellow, then add a golden yellow, and finish with some orange for a warm, glowing highlight. Feel free to play with surprising color combinations; you might find amazing results!
Always let each layer dry completely before adding the next one. This prevents smudging and keeps the colors clear. Practice makes perfect, so keep trying different layering techniques until you find your unique style.
Experimenting with Different Types of Gel Pens
Once you know the basics, don’t hesitate to try different gel pens. There are many options, beyond just basic colors, that can make your art special.
If you want a more exciting look, give glitter or neon gel pens a shot. Glitter gel pens have shiny pieces that can add fun or highlight shiny parts. Neon gel pens are great for bold highlights and bringing bright energy to your art.
You can also use refillable gel pens. They are good for the environment and give you many choices of ink colors and types. You can find metallic, pastel, and even glow-in-the-dark inks. The options are endless!
Using a White Gel Pen for Contrast and Light Reflection
The simple white gel pen is a hidden tool for making bright, realistic highlights in art. Its thick white gel ink stands out well against dark colors or rough surfaces. This special quality helps show light reflections. It adds realness and depth to your art.
When using a white gel pen, remember that using less can be better. Begin by placing small dots or thin lines in the parts where light naturally falls on the subject. Then, you can slowly add more layers to increase brightness.
For a softer look, you can carefully blend the gel ink with a cotton swab or your finger. This method is great for showing gentle light sources or creating a soft, dreamy feel.
Blending Gel Pen Highlights with Other Mediums
The beauty of gel ink comes from its bright colors and how it can mix well with other art supplies. This flexibility opens up endless creative options. You can create unique textures and beautiful visual effects.
Using gel pens together with pastel pencils can give you stunning results. The smooth and thick feel of gel ink works well with the soft texture of pastels. This lets you layer colors and make bright highlights that stand out on the page.
Gel pens also pair well with watercolors. They add a bit of shine and sharpness to your painted areas. If you put gel pen highlights on dry watercolors, you can show tiny details, outline shapes, or even make special light effects that blend with the soft flow of the watercolors.
Applying Gel Pen Highlights to Dark or Black Paper
Using dark or black paper can make your gel pen highlights pop. This creates bright and almost magical artwork. This technique is great for artists working on things like stars, glowing animals, or abstract designs where highlights should grab attention.
When you use black paper, try to pick lighter and brighter colors for your gel pens. These will give you the best contrast. Pens in white, silver, and gold are very effective. They help you make bright effects that shine against the dark background.
Feel free to try out layering techniques. This will help you build the brightness of your highlights. Also, using fine-tipped gel pens can add small details and textures, bringing your artwork to life.
Enhancing Texture with Gel Pens
While shiny highlights are pretty, gel ink is great for much more than just adding shine. Gel pens are very flexible, letting you make many textures that bring your art to life.
To create texture, you need to understand how different strokes and pressures change how the gel ink goes on. For example, short, dashed lines can make fur or grass look real, while swirls work well for clouds or water.
Try doing stippling, cross-hatching, or even scribbling to show different textures and surfaces. Don’t hesitate to mix different techniques to make a more interesting effect.
Creating Gradient Effects with Gel Pen Shading
Mastering shading with gel pens can give your artwork amazing gradient effects. This adds depth and energy to your work. You can create smooth transitions by changing from light to dark or by mixing different colours to show light and shadow.
To shade well, build up the pigment slowly. Start by applying your gel pen lightly. Then, press harder in the areas you want darker. You can also layer different shades of the same colour. This blending can create a natural gradient look.
Try different blending tools like cotton swabs, blending stumps, or even your fingertip. This helps to soften edges and makes a smooth transition between colours. Remember, practice is important. Spend time trying different shading techniques. Soon, you will find the best methods for your art and style.
Sealing and Protecting Your Artwork After Adding Gel Pen Highlights
After putting your time and effort into making beautiful gel pen highlights, it’s important to protect your artwork. This helps keep it safe from smudging, fading, and damage. By doing this, you can maintain the lively colors of your art for many years.
One great way to protect your artwork is by using a fixative. Fixatives come as sprays, liquids, or pencils and you can find them at most art supply stores. When picking a fixative, choose one made for water-based mediums, like gel pens. It’s a good idea to test it on a scrap piece of paper first. This will help you see if it works well with your gel pens and avoids any unexpected issues.
Another important tip is to store your artwork correctly. Framing it under UV-protective glass can help guard it against fading from sunlight. Also, keep your art in a cool, dry area, away from direct sunlight, humidity, and extreme heat or cold. These things can harm the artwork and affect the longevity of your gel pen highlights.
Conclusion
In conclusion, learning how to make shiny highlights with gel pens can really improve your artwork. Choosing the right pens and surfaces is important. You can also play with different colors and textures. Each choice adds a special shine to your pieces. Gel pens are great for adding details and bright effects. Whether you are just starting out or have been creating for years, using gel pen highlights can add a magical touch to your art. Let your imagination shine using these techniques. Start exploring the world of shiny highlights today!
Frequently Asked Questions
What Makes Gel Pens Ideal for Adding Highlights in Art?
Gel pens are different from regular ballpoint pens. They use a smooth and colorful gel ink. This ink comes in many bright colors and finishes. Gel pens work great for adding bright highlights on both light and dark paper. They also mix well with other mediums, like pastel pencils.
Can Gel Pen Highlights Be Applied Over Any Art Medium?
Gel ink is very flexible, but you need to think about how it works with other art materials. It usually mixes well with water-based materials. Still, you should test the gel ink on a scrap piece of your chosen material first. This will help you make sure it goes on smoothly and avoids any problems.